QRTonic
QRTonic
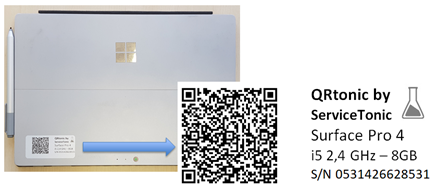
The way QRTonic works is simple: it consists of printing an adhesive label with a QR code, along with a short description, which will be attached to the assets or devices that the client wants to manage. This label can be printed from a portable printer, allowing the agent to travel to the location of the asset and instantly generate the label, print it and link it to the device in question.
Once the asset has that label, any user, through a generic QR code reader installed on their cell phone or from the ServiceTonic scanner itself, can scan it and consult the device information and open a ticket from there, notifying any incident or request. Instantly, the ticket reaches the person responsible for the asset and can proceed to its solution immediately.
How to use QR codes
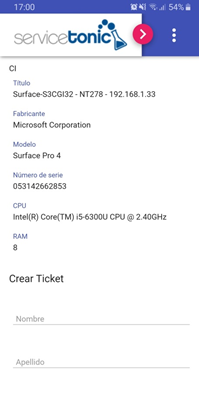
The user or customer can scan a QR code, attached to the asset, using any QR code scanner or the scanner included in the mobile version of ServiceTonic.
Once the QR code is scanned, the device information is obtained, and depending on how the system has been configured, the possibility of generating an incident is offered.
Vista de agente
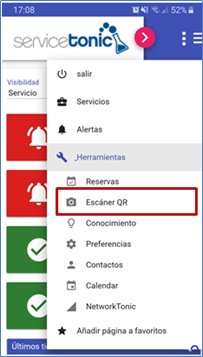
An agent can also scan the QR code associated with the asset: he can do it either from any scanner, although he will then have to identify himself in the ServiceTonic application to act as an agent; or the most advisable, scan the QR from the same scanner that includes the mobile version of the ServiceTonic application, selecting the QR Scanner option; in this way he can already access the tools offered by the application.
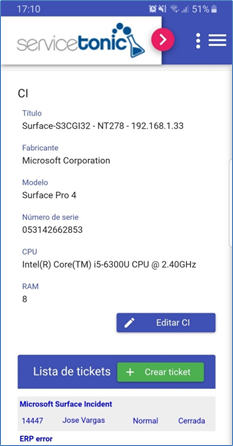
Once the QR code is scanned, the information linked to the scanned asset will be displayed and will also allow the agent to perform the following operations:
- Edit the scanned asset
- View the list of tickets of the scanned asset and be able to access one of them.
- Create a new ticket linked to the scanned asset.
QRTonic Administration
Previous steps to activate QRTonic
The CDMB administrator is responsible for managing the CIs (assets/devices) that may have a QR code assigned to them.
For a CI to have a QR assigned, previously, they must perform some simple tasks to generate the label that will be pasted on the device.
These tasks are:
- Configure the QR Code Management in the different CI types that may have CIs with a QR code assigned.
- Activate the QR code in those CIs where applicable.
- Print the QR codes and label the corresponding CIs
Configuration of QR codes in the CIs
From this option you will configure how the QR code will be for each type of CI registered in the system.

Configuration settings:
- Service: The ServieTonic service in which the tickets associated to the scanning of a QR code will be created will be defined.
- Default contact: In the case of allowing to create tickets anonymously ServiceTonic will take the anonymous contact as the ticket contact. To do this, the user "Anonymous" must be created with the email anonymous@servicetonic.com
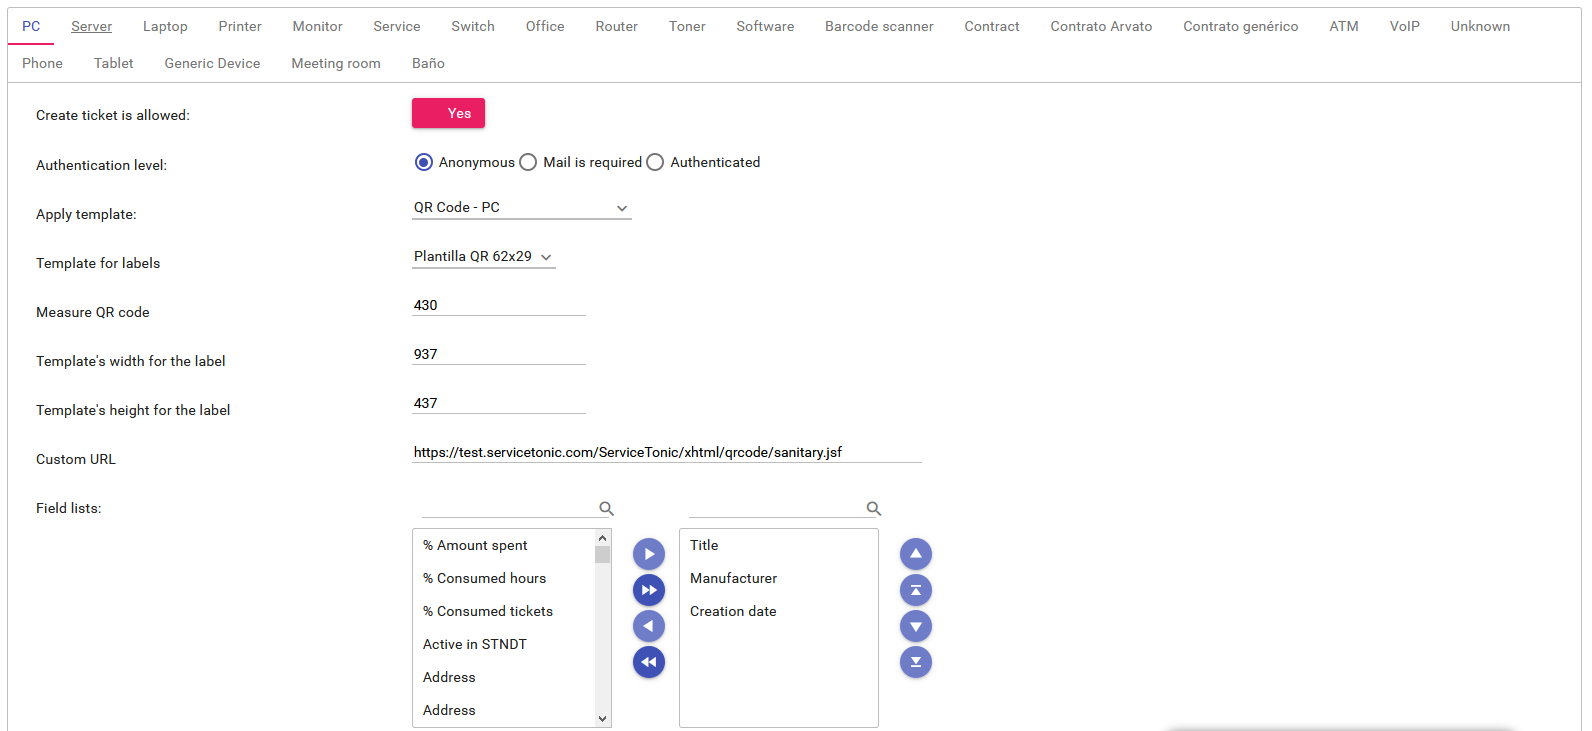
Additionally, for each CI type where you want to allow the use of QR codes, you must specify the following parameters:
- Create ticket is allowed: Indicates if you allow to create tickets by scanning the QR code.
- Authentication level:
- Anonymous (does not require any contact details to report a ticket).
- Mail is required (the user must at least provide his email address when reporting a ticket)
- Authenticated (user must be authenticated on ServiceTonic in order to report a ticket)
- Apply template: Refers to the template to be used for ticket creation. When scanning the CI, if the "Create ticket" option is enabled, this template will be displayed. You can have a customized template for each type of CI. To know how to create templates, click here
- Template for labels: This is the html template that will be used to generate the individual printing of the label with the QR code. ServiceTonic offers a base template that can be printed with, but the user can have customized templates by requesting support from ServiceTonic.
- Measure QR code: This is the size of the height/width of the QR code in pixels.
- Template width for the label (px): Width in pixels of the printed label.
- Template height for label (px): Height in pixels of the printed label.
- Field list: List of CI fields to be displayed when scanning a QR code.
Custom URL
When scanning the QR code, the user can access 3 different types of URL's: the default URL, a customizable URL within ServiceTonic, or an external URL, such as a URL from the customer's domain.
- Default URL: in case no URL is specified, when scanning the QR code, a ticket will be opened including the fields indicated in Administration > CMDB > QR Code.
- Custom URL in ServiceTonic: this custom URL must be specified in its field. The customer decides which elements can be incorporated in this URL. Thus, for example, a bathroom cleaning service can define a URL in which to indicate whether the bathroom is clean, if there is soap or not... It is also possible to open a ticket with some fields or others depending on whether the user is logged in or not.

In this way, the ticket is generated with some fields or others, or with one information or another.
To have a personalized URL, please contact the ServiceTonic support team.
- Own URL: it is also possible to access your own URL, e.g. your company's URL.
Activation of QR codes in the CIs
Once the management of the fields linked to each type of CI has been configured, the CMDB administrator must add the QR_ENABLED field, "QR Activated", to the header of the CIs.
To do this, go to Administration / CMDB / Page Layout:
- Select "QR Enabled" in "Field List."
- Drag it to the "Header" section.
- Save the configuration changes
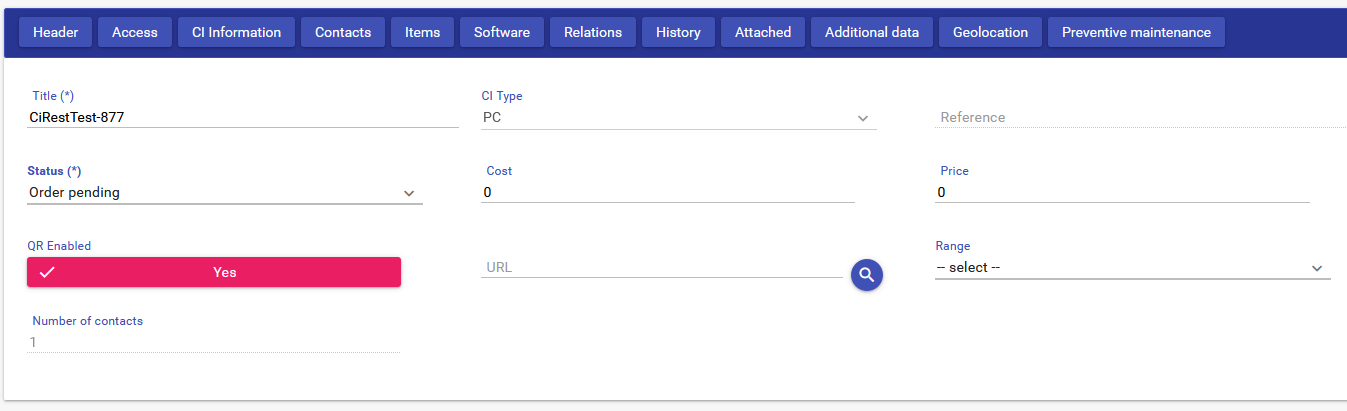
Now it only remains to activate the QR code to each CI:
- Go to the corresponding CI.
- Check the QR Enabled field to Yes (QR_ENABLED)
- Save the changes to the CI
Print labels
Once all the necessary settings have been made, all that remains is to generate the labels with the QR and the defined fields on paper.
This can be done in two ways, either individually when you only want to get a label for a specific CI, or in bulk, especially when starting the QRTonic functionality.
Individual printing of labels with QR code
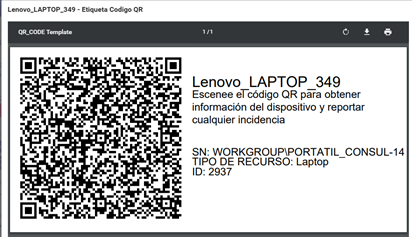
To print the label with the QR code of a specific CI, access the CI detail and select the indicated icon:
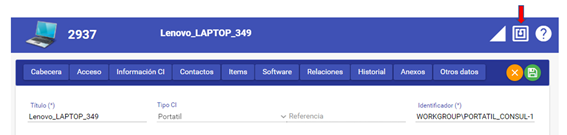
After clicking on this icon, a window will appear with the preview of the label (the generation of the QR code and the fields added in the html template indicated in step 4.2) and the possibility to print it.
Mass printing of labels with QR code
To print labels with QRTonic in bulk, please contact the ServiceTonic support team who will enable an integrator in your system to retrieve the URL to which the QR code will be linked in a CMDB field and enable the MS Word add-in to generate QR codes offered by ServiceTonic.
Once this is done simply follow the instructions below to generate a bulk printout of your labels:
- Generate a report in Excel format of the assets you want to tag containing the URL field and the rest of the fields you want the tag to appear.
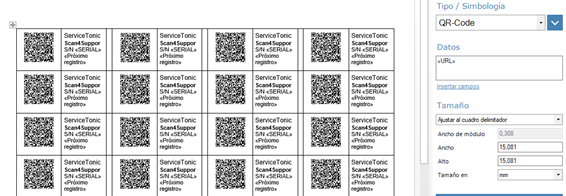
- Generate your print template with MS Word using the Correspondence options:
- Select recipients to link the Excel file to the report with the CIs.
- Insert the combined fields including the URL field to format your label
- Use the QR Code Generator to include in the template the QR code linked to the URL linked field
- Select Finish and merge to Generate the merged document ready to send to print.
Sample QR Code printing templates are available from the ServiceTonic team upon request.