Maps
Exploitation of maps
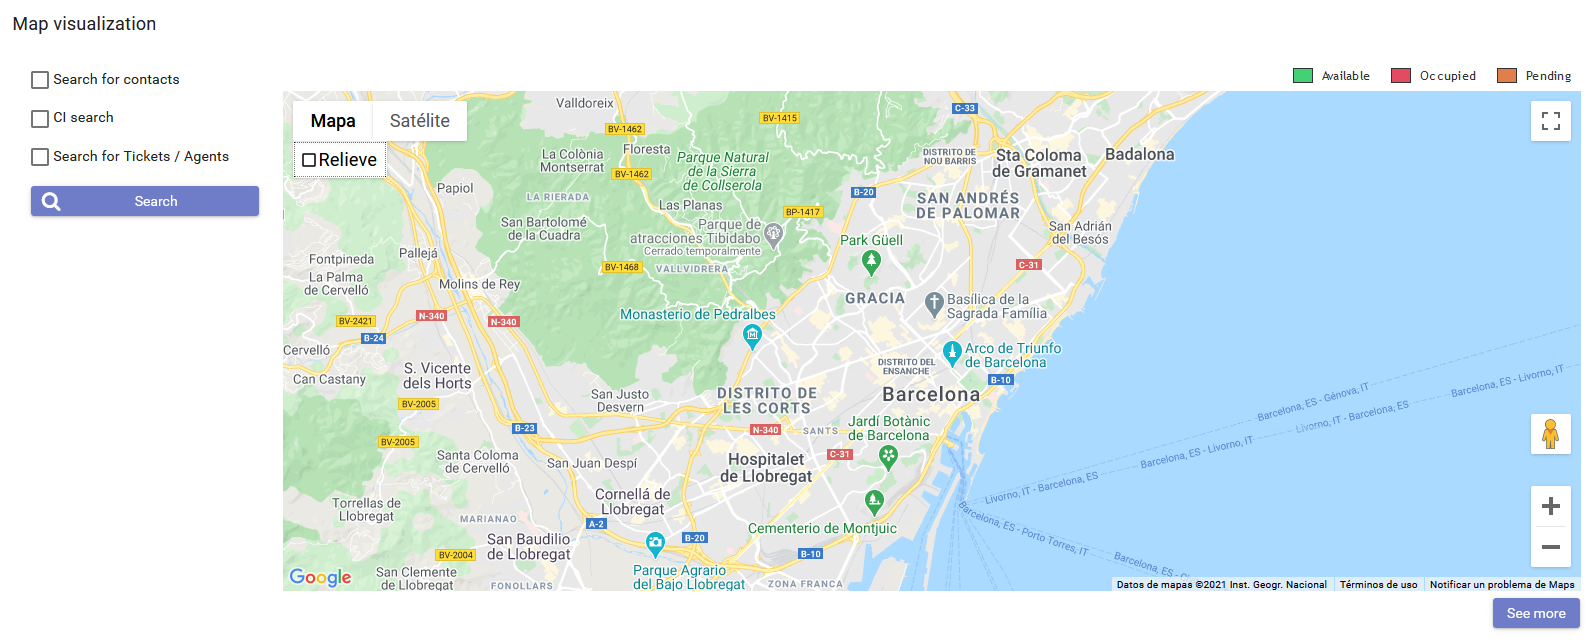
The information related to tickets, contacts, agents and CI's can now be exploited. To do this, go to Tools / Maps.
Geolocate Contacts and CIs
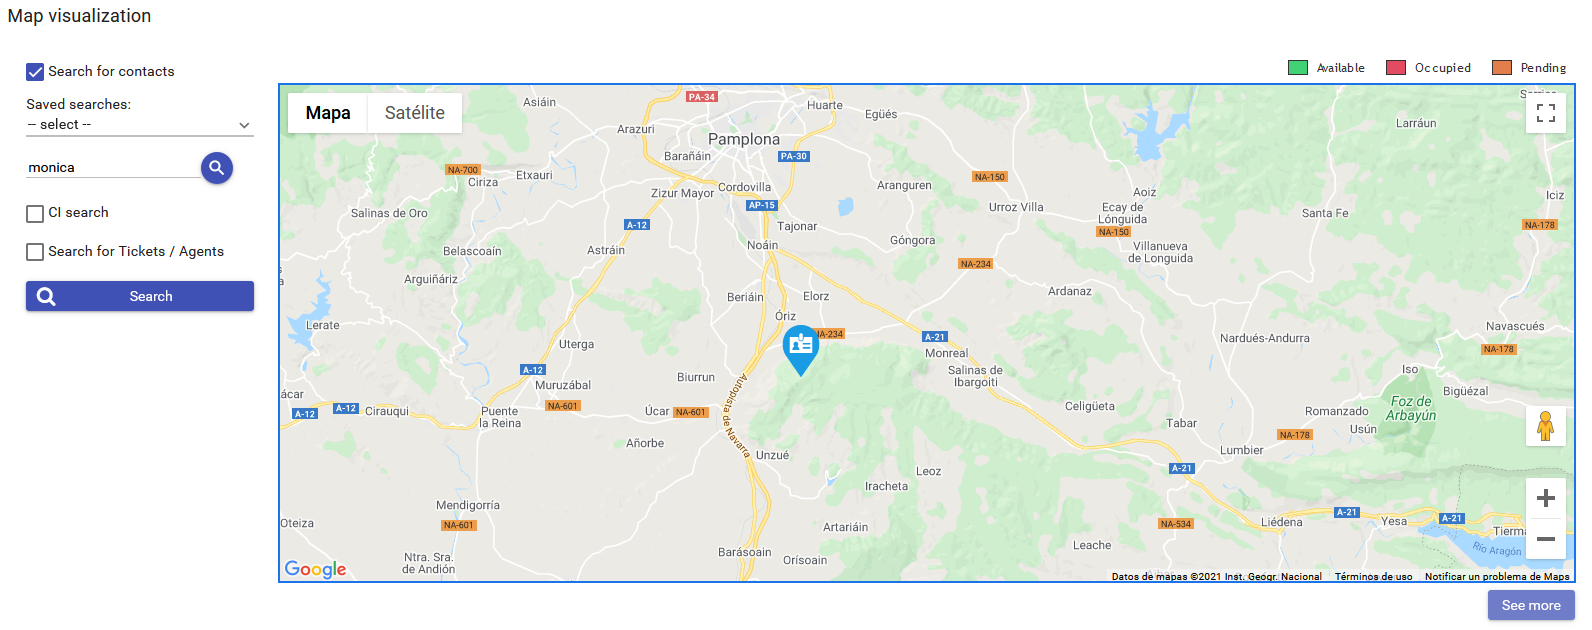
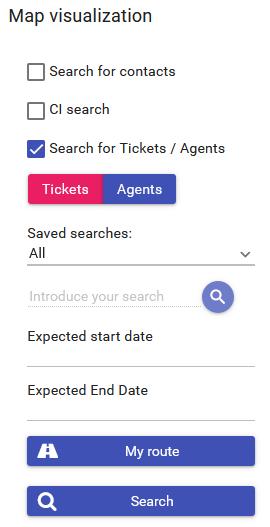
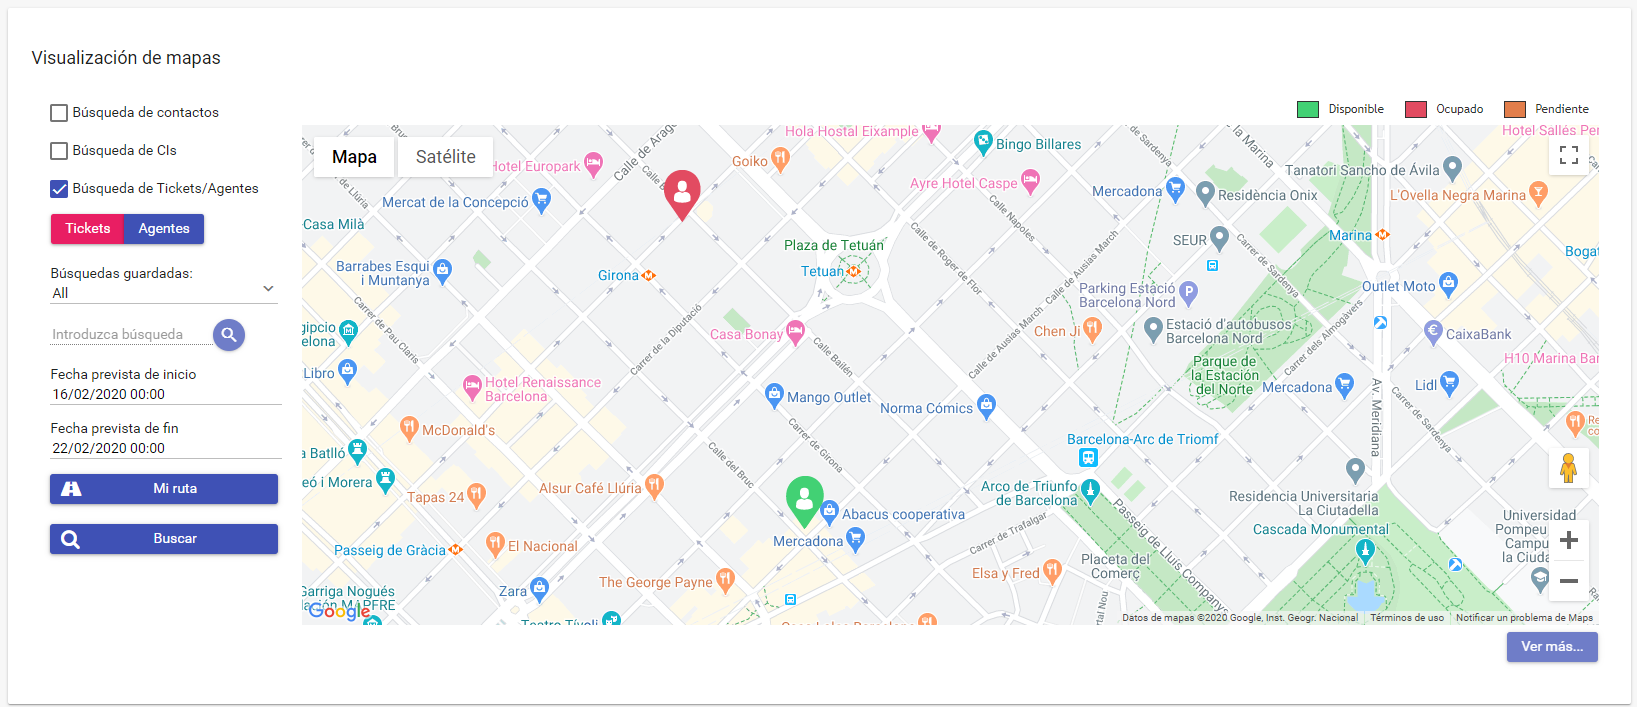
If you want to locate the contacts added in the saved Search, check the box "Search for contacts" and select the Search in question. This also applies to the geolocation of CIs. It is also possible to locate a single contact or a CI by typing its name in the search engine.
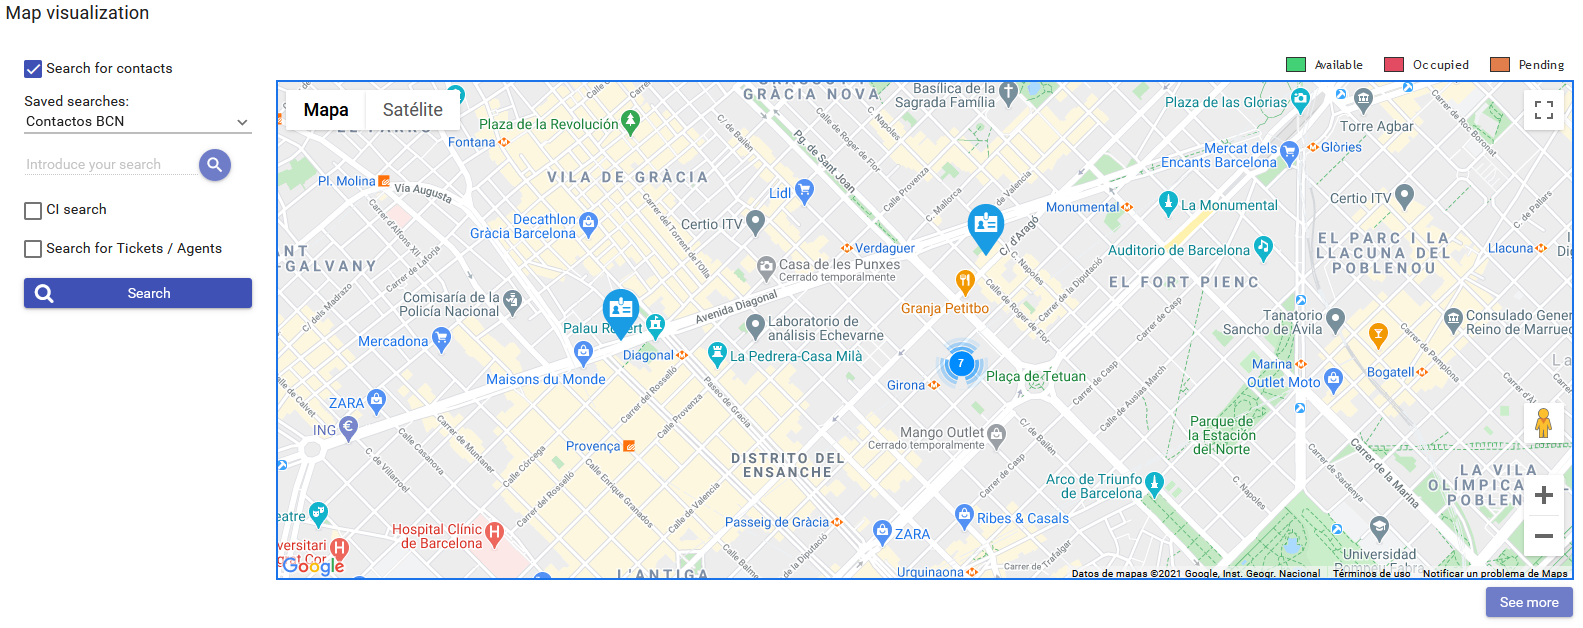
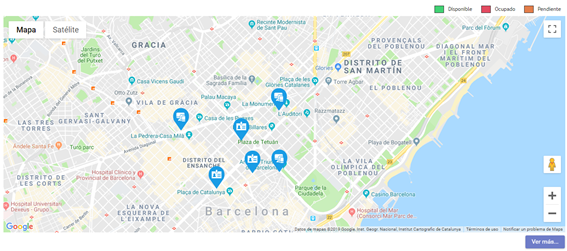
In case the markers, in this case the contacts, are geographically very close, Google Maps will group them in a cluster indicating the number of contacts located in that area. By clicking on it or zooming into that area, the cluster opens and the markers can be viewed individually.
It is also possible to locate a contact individually in the search field.
It is possible to consult the information of that contact by clicking on it:
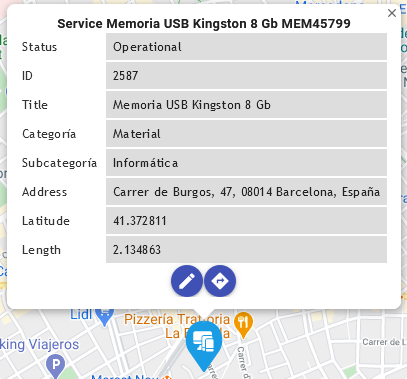
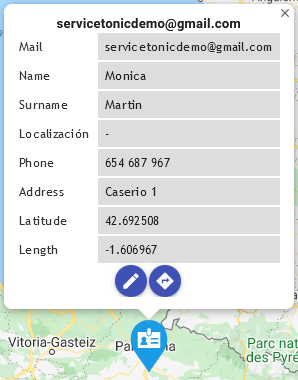
In the case of CIs, the information displayed in these pop-up windows, are the fields that have been added in the view. In this way, fields can be added or removed in the view management itself.
For contacts, the fields that make up all the contact information are selected by default.
At the bottom of the contact or CI information box, two icons appear:
- Edit: edits the contact or CI data.
- Use Google Maps: allows you to open the Google Maps tool.
Thanks to the customization of the icons, it is possible to differentiate the contact markers from the CI markers.
Geolocate tickets
As in the case of contacts and CIs, it is possible to locate all the tickets linked to a view, but the geolocation of tickets has an additional advantage, especially for field agents who need to know which tickets they have to manage during their working day, as well as their location in the space.
This advantage is that when generating a ticket, through the system field "Expected date", it is possible to link a date of execution to it, in this way, the agent can see which tickets and with which geolocation he/she has assigned for that date. For this reason, it is essential to add the date when generating the ticket, otherwise the ticket will not be shown on the map.
Geolocate tickets and agents from time control
But the application also allows you to geolocate agents through the time control. Every time an agent registers a ticket in his time control, his location is registered on a map, and the same happens when the exit is registered.
The indicators will be differentiated with two colors:
- Green: only the check-in has been done.
- Red: check-in and check-out have taken place. This allows the manager to see throughout the working day where the field agent started working, and at the end of the working day, to see where the agent has finished working.
To locate these agents, the following steps must be followed:
- Access the time control service.
- Go to the map functionality from the Tools button.
- In the side column of the map, select the option "Search for Tickets / Agents" and here, check the Tickets option.
- Fill in the fields that are part of the Tickets option.
- Search.
Now you will see on the map the results of the tickets related to the time control of the agents or an entire work team.
Geolocate agents according to the tickets they are managing
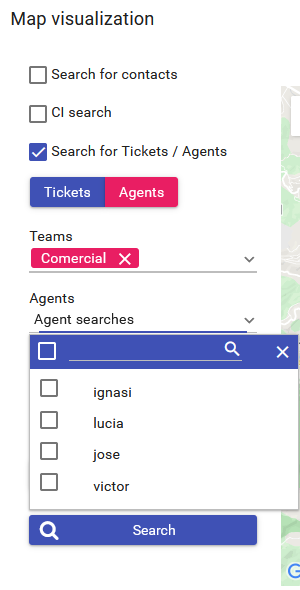
In order to geolocate the agents, first of all, you must select the work team previously created in Administration / Service / Agents, in the "Teams" tab, and then the agent or agents for whom you want to know the tickets they have geolocated.
In this way, if, for example, we have 4 tickets linked to two agents, the map will show the tickets linked to these agents:
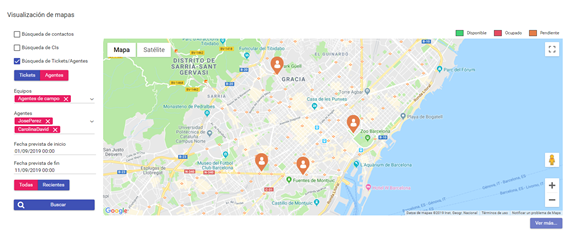
In this example, the tickets are Pending (orange color).
Accessing ServiceTonic as an agent from the mobile device
When the agent accesses ServiceTonic from his mobile device, he must check in on the assigned ticket, always being in the location where the ticket is georeferenced, in this way, it will appear as "Busy" and the map will be updated. To make this chek in, just swipe to the right and the chek will appear to mark and indicate which is your location.
At this moment, this marker will appear in red on the map, indicating that the agent is Busy.
Now, in the ticket search, this icon has also changed color.
When the agent closes the ticket, the icon changes to Available, in green color.
The ticket is automatically checked out by SericeTonic.
In the event that the agent forgets to check in the ticket before entering it, the application itself will automatically generate it when the agent saves the changes to the ticket.
When the tickets are closed, the map will remain with green markers, indicating that all tickets have been resolved.
My Route
This option allows the agent to see on the map itself, the tickets to be managed in the given period of time.
In addition, this option also allows the administrator to know the agent's ticket schedule. To know the route of one of the agents, it is not necessary to select any of the saved searches, just enter the user name of the agent in question, select the magnifying glass and define the expected start and end date, now the map will only show the markers (or tickets in this case) related to that agent.